
Have you ever wondered what the process of apparel manufacturing looks like?
In simpler words, what is the mechanism by which clothes are made? What are the steps involved in transforming a design idea into a wearable garment?
In this blog post, we will answer these questions and more, as we take you through the 10 steps of apparel manufacturing.

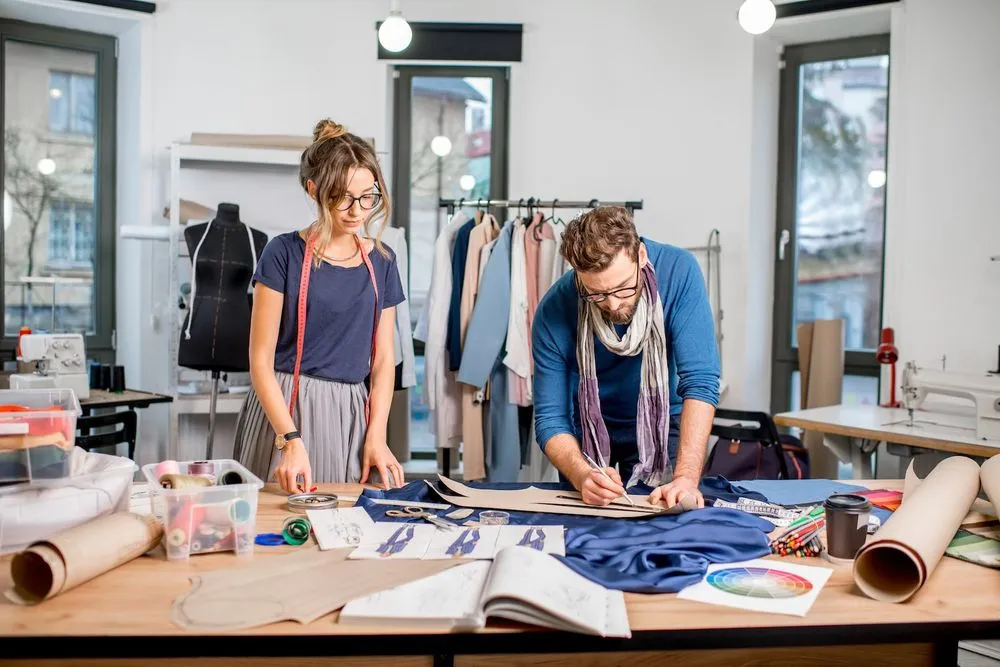
Step 1: Design the Garment
The first step of apparel manufacturing is garment design. This involves creating a sketch, a technical drawing, and a tech pack for your garment.
Garment design is a creative and technical process that involves translating a design idea into a wearable garment.
It requires both artistic and analytical skills, as well as knowledge of fabrics, patterns, sewing, and finishing. Garment design is influenced by various factors such as consumer preferences, market demands, technological innovations, environmental sustainability, social responsibility, etc.
Garment designers need to keep up with these trends and adapt their designs accordingly. The first step of garment design is to create a sketch of your design idea.
A sketch is a rough illustration of your design idea, showing the shape, style, and features of your garment. A sketch helps you to visualize your concept and communicate it to others. You can use pencil and paper or digital tools such as Adobe Photoshop or Illustrator to create your sketch.
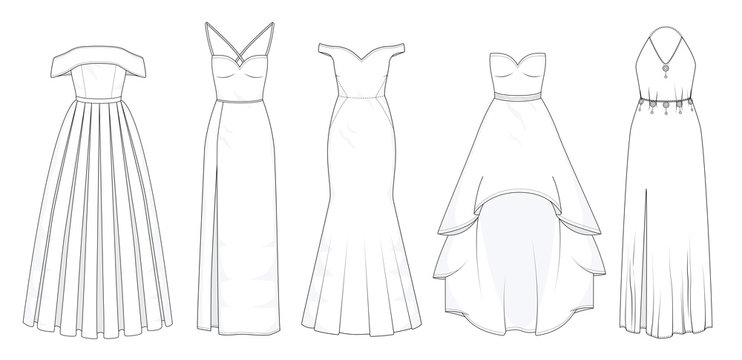
Here is an example of a sketch of a dress:
The second step of garment design is to create a technical drawing of your design. A technical drawing is a detailed and accurate representation of your design, showing the front, back, and side views of your garment, as well as any seams, stitches, buttons, zippers, etc.
A technical drawing helps you to specify the dimensions and construction details of your garment and communicate them to the manufacturer.
You can use digital tools such as Adobe Illustrator or InDesign to create your technical drawing.
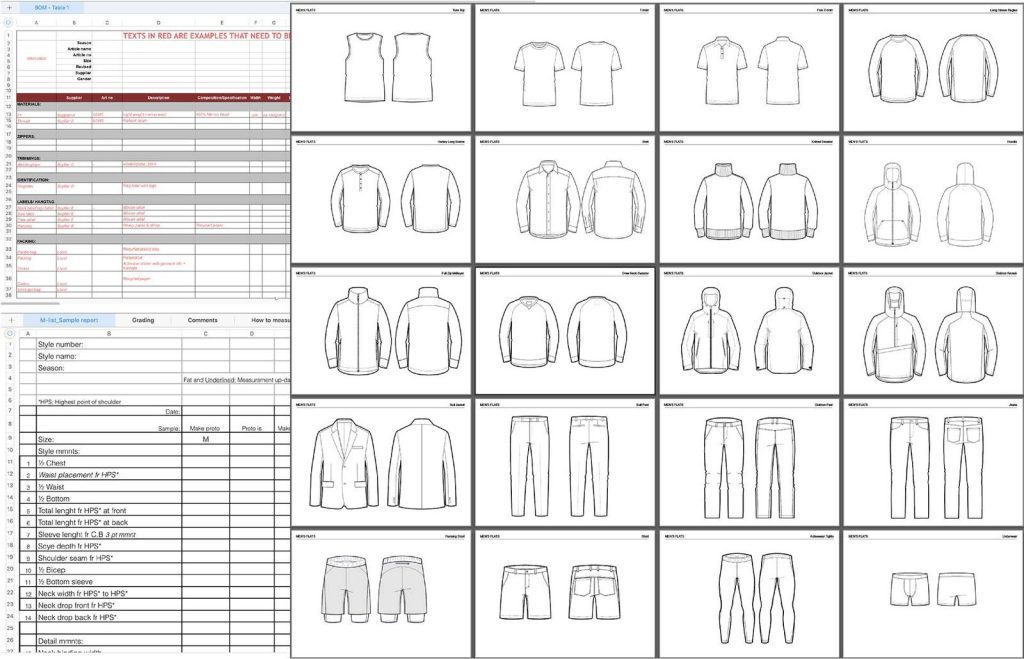
Here is an example of a technical drawing of a dress:

The third step of garment design is to create a tech pack for your design.
A tech pack is a document that contains all the information and specifications needed to produce your garment, such as measurements, materials, colors, labels, tags, etc.
A tech pack helps you to ensure that your garment is made according to your design requirements and quality standards.
Here is an example of a tech pack of a dress:
These documents are essential for communicating your design vision and specifications to the manufacturer.
Professionals use software tools such as Adobe Illustrator, Photoshop, or InDesign to create these documents.
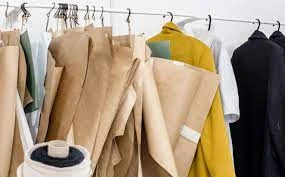
Step 2: Source the Materials
The second step of apparel manufacturing is to source the materials for your garment, technically called as fabric sourcing.
This involves finding and selecting the best fabrics, trims, and accessories for your garment.
Trims are any non-fabric materials that are used to embellish or enhance your garment, such as buttons, zippers, lace, ribbons, etc.
Accessories are any items that are attached or worn with your garment, such as belts, hats, scarves, jewelry, etc.
Trim sourcing and accessory sourcing are the processes of finding and selecting the best trims and accessories for your garment.
Material selection is the process of choosing the most suitable materials for your garment based on your design specifications and requirements.
Makers need to consider various factors that affect their sourcing decisions, such as quality, cost, availability, sustainability, and compliance.
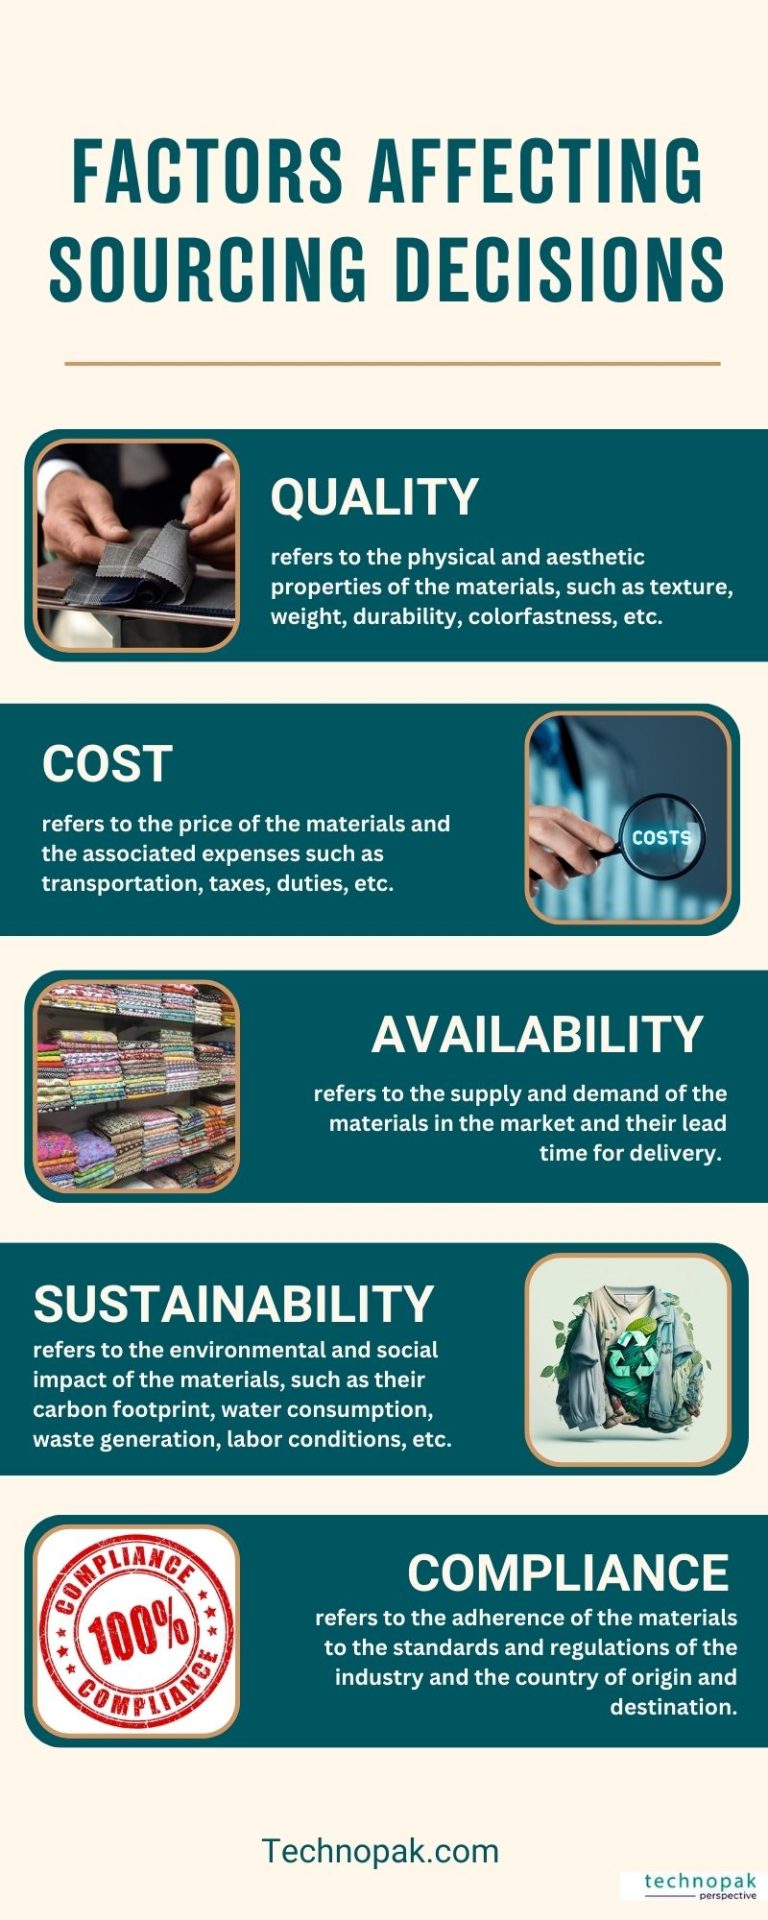
1) Quality
It refers to the physical and aesthetic properties of the materials, such as texture, weight, durability, colorfastness, etc
2) Cost
It refers to the price of the materials and the associated expenses such as transportation, taxes, duties, etc.
3) Availability
It refers to the supply and demand of the materials in the market and their lead time for delivery.
4) Sustainability
It refers to the environmental and social impact of the materials, such as their carbon footprint, water consumption, waste generation, labor conditions, etc.
5) Compliance
It refers to the adherence of the materials to the standards and regulations of the industry and the country of origin and destination.
Industry professionals use online platforms such as Fibre2Fashion, IndiaMart, or Alibaba to source materials from various suppliers around the world.
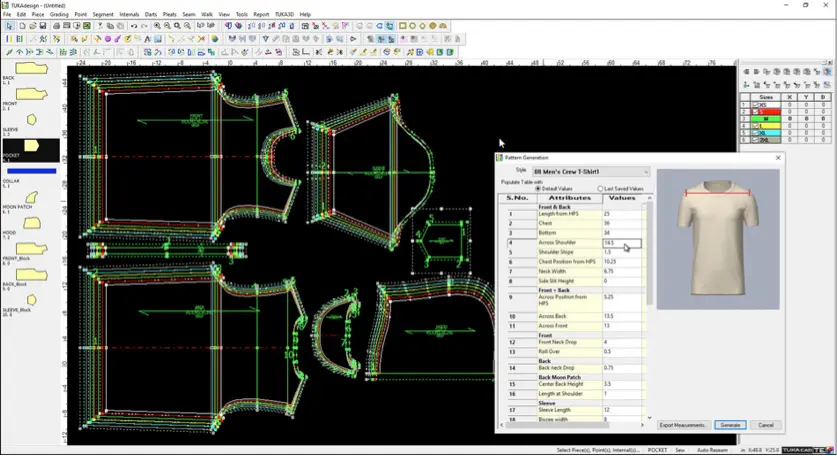
Step 3: Develop the pattern
The third step of apparel manufacturing is to develop the pattern for your garment based on your tech pack and measurements.
A pattern is a template that shows how to cut and sew your fabric pieces to create your garment.
There are three main methods of pattern making: drafting, draping, and flat pattern making.
Pattern making is the process of creating a pattern for your garment using one or more of these methods.
Pattern development is the process of refining and improving your pattern based on feedback and testing.
Pattern drafting is the process of drawing your pattern on paper or on a computer using mathematical calculations and measurements.
The 3 mechanisms of pattern making include:

1) Drafting
It is a method that involves using mathematical calculations and measurements to draw a pattern on paper or on a computer.
This method requires a high level of accuracy and skill, as well as knowledge of geometry, algebra, and trigonometry.
Drafting can be done manually or digitally, using rulers, curves, and other tools or software programs.
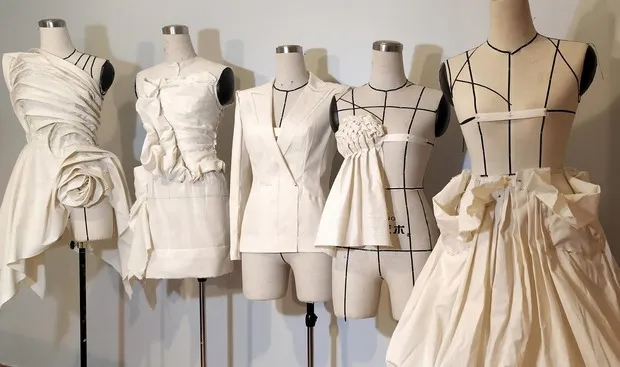
2) Draping
It is a method that involves using a dress form or a mannequin to drape fabric over it and pin it into shape.
This method allows you to see how the fabric behaves and fits on a three-dimensional body, as well as experiment with different styles and features.
Draping can be done by hand or with the help of software tools.
3) Flat pattern making
It is a method that involves using an existing basic pattern (also called a sloper or a block) and modifying it according to your design specifications.
This method saves time and materials, as you do not need to start from scratch every time you create a new design.
Flat pattern making can be done by hand or with the help of software tools.
For all the 3 methods of pattern making, designers use software tools such as Optitex, Gerber, or Lectra to create digital patterns or print them on paper.
These tools allow them to edit, modify, grade, and test your patterns easily and efficiently.
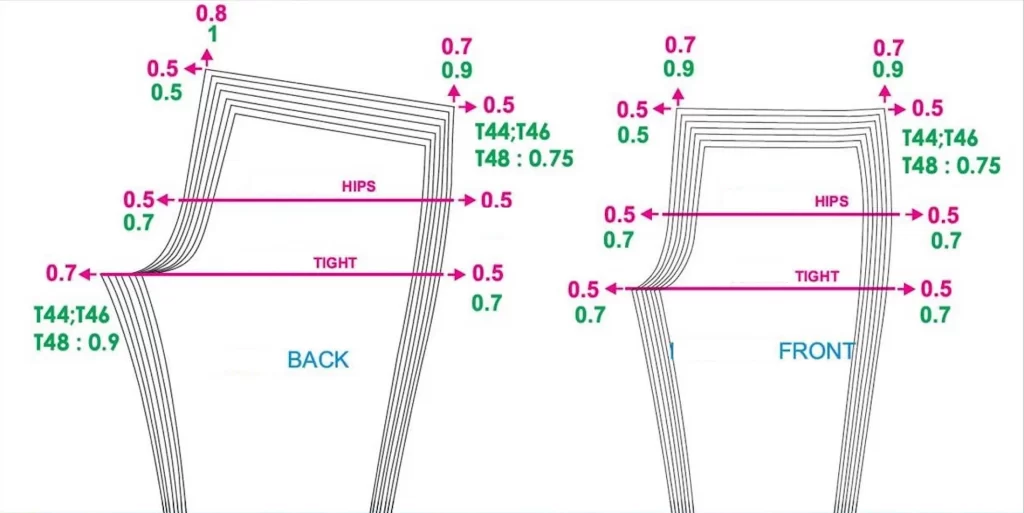
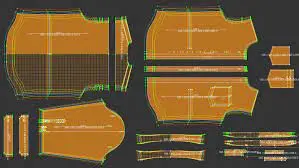
Step 4: Grade the pattern
The fourth step of apparel manufacturing is to grade your pattern to create different sizes for your garment.
Grading is one of the most important aspects of pattern making, as it ensures that your garment fits well on different body types and sizes.
Grading entails the process of increasing or decreasing the dimensions of your pattern according to a size chart or a grading rule.
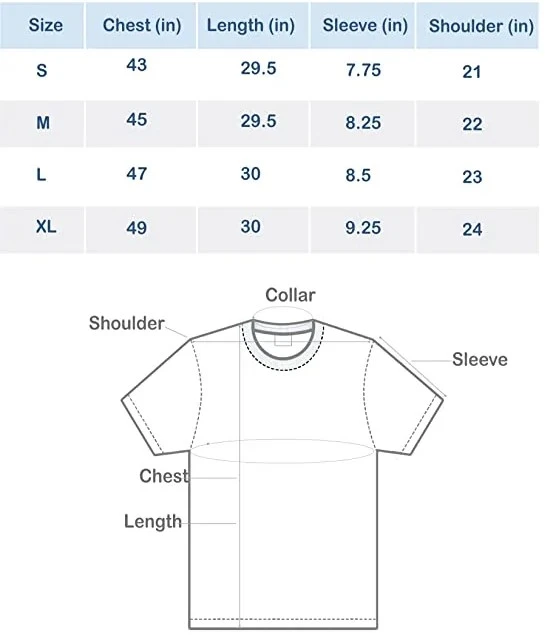
A size chart is a table that shows the measurements for each size of your garment (such as XS, S, M, L, XL). A grading rule is a formula that shows how much to add or subtract from each measurement for each size increment or decrement (such as +2 cm for bust circumference from XS to S).
Grading is nothing but the process of applying one or more of these techniques to your pattern. Size grading is the process of creating different sizes for your garment based on your size chart and grading rule.
Grading system is the set of standards and methods that you use for grading your pattern. There are three main techniques of grading: rule grading, computer grading, and marker grading.
1) Rule grading
It is a technique that involves using rulers, curves, and other tools to manually grade your pattern on paper or on a computer.
This technique requires a lot of skill and experience, as well as knowledge of geometry and algebra.
Rule grading can be done by hand or with the help of software tools such as Optitex, Gerber, or Lectra.
2) Computer Grading
It is a technique that involves using software tools such as Optitex, Gerber, or Lectra to automatically grade your pattern based on a size chart or a grading rule.
This technique saves time and reduces errors, as well as allows you to edit, modify, and test your graded pattern easily and efficiently.
3) Marker Grading
It is a technique that involves using a plotter or a printer to print your graded pattern on a large sheet of paper or fabric (also called a marker).
This technique optimizes the use of fabric and minimizes fabric wastage, as well as allows you to cut multiple layers of fabric at once.
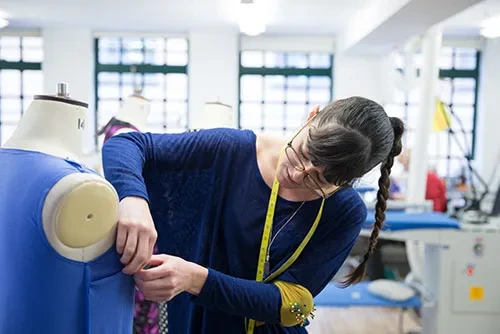
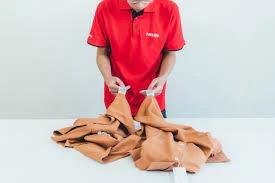
Step 5: Make the sample
The fifth step of apparel manufacturing is to make the sample of your garment using your graded pattern and sourced materials.
A sample is a prototype or a mock-up of your garment that shows how it looks and fits before mass production.
Sample glossary includes the following terms:
Sample making is the process of creating a sample for your garment using one or more of these types.
Sample sewing is the process of sewing your sample using your sewing machines and instructions.
Garment sampling is the process of evaluating your sample for design, fit, quality, and functionality.
There are different types of samples, such as prototype, fit, pre-production, and production samples.
1) A prototype
First sample that shows the basic shape and style of your garment. This sample is used to check the feasibility and appearance of your design idea. Prototype samples are usually made from cheap or similar fabrics and trims as the final product.
2) A fit sample
It is a sample that shows the fit and measurements of your garment on a fit model or a mannequin. This sample is used to check the accuracy and comfort of your pattern and grading. Fit samples are usually made from the same or similar fabrics and trims as the final product.
3) A pre-production sample
It is a sample that shows the final design, materials, colors, and details of your garment. This sample is used to check the consistency and quality of your sourcing and sewing.
Pre-production samples are usually made from the exact fabrics and trims as the final product.
4) A production sample
It is a sample that shows the quality and consistency of your garment from the mass production batch.
This sample is used to check the conformity and compliance of your manufacturing.
Production samples are randomly selected from the finished garments.
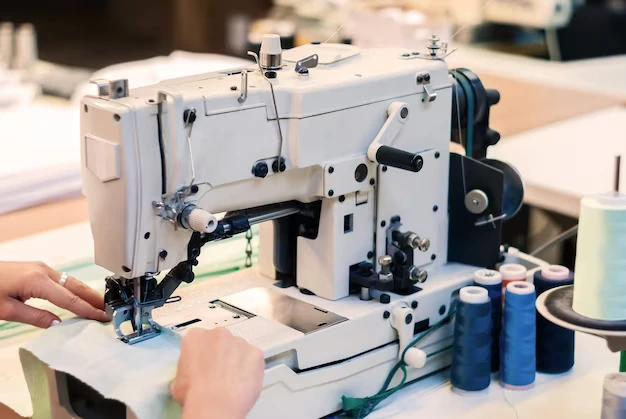
Makers use sewing machines such as single needle, overlock, or coverstitch machines to sew their samples.
They also use software tools such as Optitex, Gerber, or Lectra to create digital samples or print them on paper or fabric.
Step 6: Test the sample
The sixth step of apparel manufacturing is to test your sample for fit, quality, functionality, and aesthetics.
Testing is the process of checking and evaluating your sample for any errors, defects, or improvements.
Makers use various methods and tools for testing, such as fit models, measuring tapes, rulers, scissors, pins, etc
TYPES OF TESTING IN DEPTH:
1) Fit testing
It is the process of checking how well your sample fits on a fit model or a mannequin according to your size chart and measurements.
This process helps you to identify any issues or adjustments that need to be made to your pattern or grading.
Fit testing can be done by yourself or with the help of a professional fit technician or a fit model. Fit models are people who have standard body measurements and proportions that match your target market or customer segment.
Makers use measuring tapes, rulers, scissors, pins, etc. to measure and mark your sample on the fit model or mannequin.
2) Quality testing
It is the process of checking how well your sample meets the quality standards and specifications of your tech pack, such as seams, stitches, buttons, zippers, etc.
This process helps you to ensure that your sample is free from any defects or faults that may affect its appearance or performance.
Quality testing can be done by yourself or with the help of a professional quality inspector or a quality control team. Quality inspectors are people who have expertise and experience in inspecting garments for quality issues and defects.
Manufacturers use tools such as magnifying glasses, needles, tweezers, etc. to inspect and fix your sample for any quality issues or defects.
3) Functionality testing
It is the process of checking how well your sample performs its intended function, such as comfort, durability, breathability, etc.
This process helps you to verify that your sample meets the functional requirements and expectations of your design and customer.
Functionality testing can be done by yourself or with the help of a professional tester or a testing lab.
Testers are people who have knowledge and skills in testing garments for functionality and performance.
Testing labs are facilities that have specialized equipment and machines to test garments for functionality and performance.
Makers use tools such as washers, dryers, stretch testers, abrasion testers, etc. to test and evaluate your sample for functionality and performance
4) Aesthetics testing
It is the process of checking how well your sample matches your design vision and expectations, such as color, style, features, etc. This process helps you to confirm that your sample reflects your design idea and appeals to your customer.
Aesthetics testing can be done by yourself or with the help of a professional stylist or a focus group.
Stylists are people who have an eye for fashion and style and can advise you on how to improve your sample’s aesthetics.
Focus groups are groups of people who represent your target market or customer segment and can provide you with feedback on how they perceive and react to your sample’s aesthetics. Makers use tools such as cameras, mirrors, lighting, etc. to capture and display your sample’s aesthetics.
Step 7: Revise the sample
The seventh step of apparel manufacturing is to revise your sample based on the feedback from testing.
Revising is the process of making changes to your sample to correct any errors, defects, or improvements. You need to consider various types of revisions, such as altering, adding, removing, or replacing features.
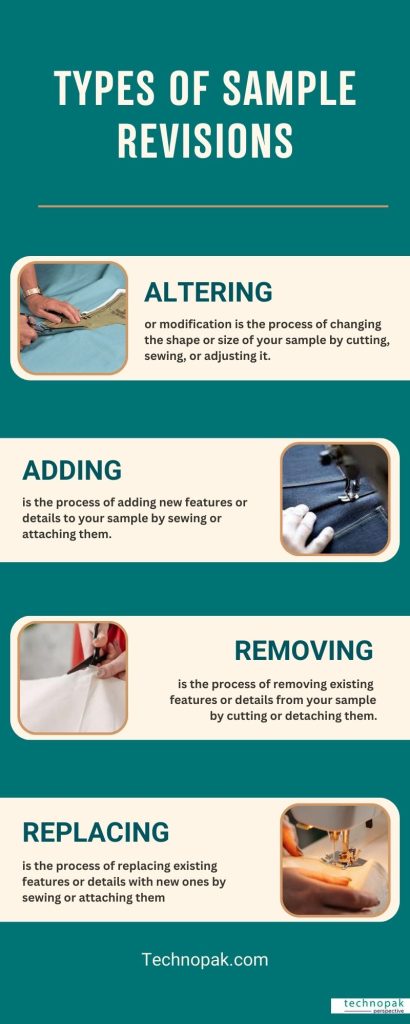
1) Altering or modification is the process of changing the shape or size of your sample by cutting, sewing, or adjusting it.
2) Adding is the process of adding new features or details to your sample by sewing or attaching them.
3) Removing is the process of removing existing features or details from your sample by cutting or detaching them.
4) Replacing is the process of replacing existing features or details with new ones by sewing or attaching them.
Makers use sewing machines such as single needle, overlock, or coverstitch machines to revise their samples.
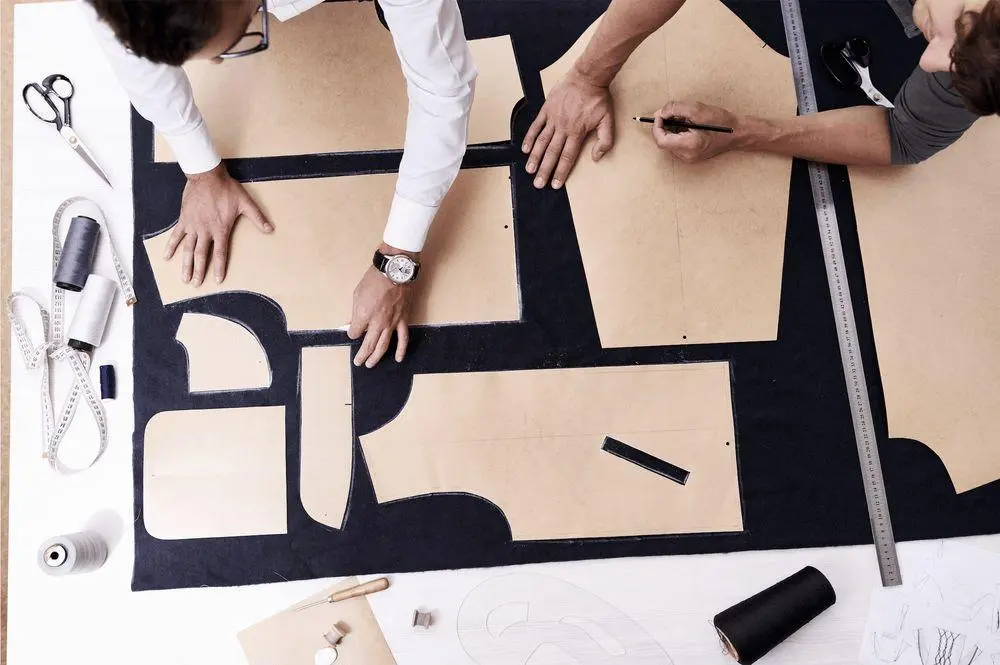
Step 8: Cut the fabric
The eighth step of apparel manufacturing is to cut your fabric for mass production using your final pattern and marker.
Cutting is the process of separating your fabric into individual pieces according to your pattern and marker.
You need to consider various factors that affect your cutting decisions, such as fabric type, fabric grain, fabric direction, fabric layout, fabric wastage, etc. * Fabric type refers to the physical and chemical properties of your fabric, such as woven or knitted, cotton or polyester, etc.
1. Fabric grain refers to the direction of the yarns in your fabric, such as warp or weft, straight or crosswise, etc.
2. Fabric direction refers to the orientation of your fabric pieces on your marker, such as up or down, left or right, etc.
3. Fabric layout refers to the arrangement of your fabric pieces on your marker, such as nested or staggered, single layer or multiple layers, etc.
4. Fabric wastage refers to the amount of unused fabric after cutting, such as scraps or selvages, which should be minimized as much as possible.
There are two main methods of cutting: manual and automated.
1) Manual cutting is a method that involves using hand tools such as scissors, knives, or blades to cut your fabric.
2) Automated cutting is a method that involves using machines such as laser, water jet, or ultrasonic to cut your fabric.
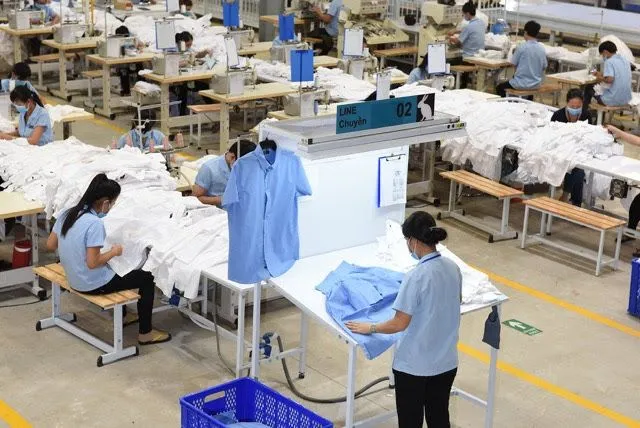
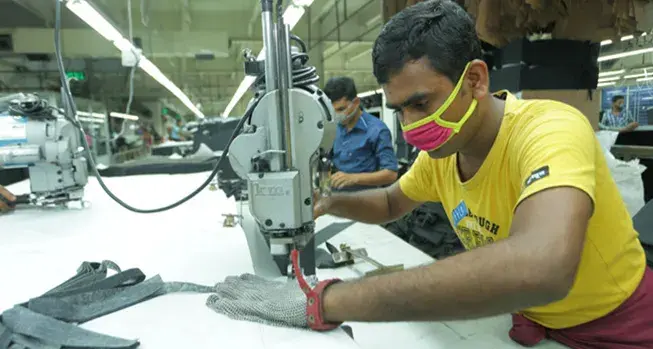
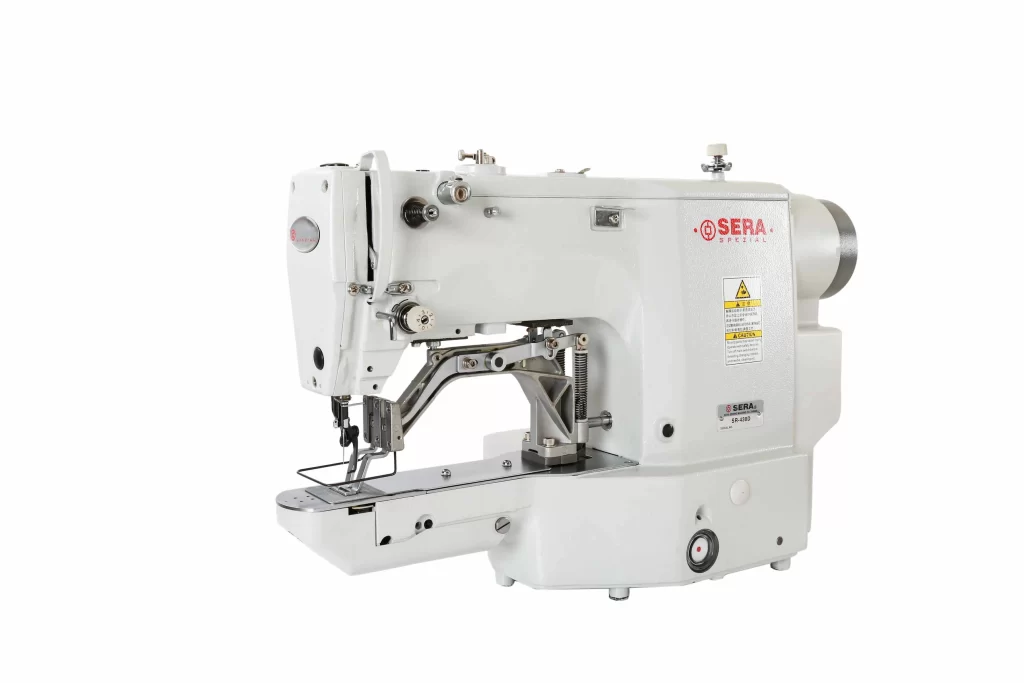
Step 9: Sew the garment
The ninth step of apparel manufacturing is to sew your garment for mass production using your cut fabric pieces and sewing instructions.
Sewing is the process of joining your fabric pieces together to form your garment. Makers consider various factors that affect their sewing decisions, such as seam type, stitch type, thread type, needle type, etc.
1. Seam type refers to the way your fabric pieces are joined together, such as plain seam, flat-felled seam, French seam, etc.
2. Stitch type refers to the way your thread is looped or interlocked to form a stitch, such as lockstitch, chain stitch, overlock stitch, etc.
3. Thread type refers to the material and thickness of your thread, such as cotton, polyester, nylon, etc.
4. Needle type refers to the shape and size of your needle, such as ball point, sharp point, universal point, etc.
There are two main types of sewing machines: single needle and overlock machines.
1) Single needle machines are machines that use one needle and one bobbin thread to form a lockstitch.
2) Overlock machines are machines that use two or more needles and loopers to form an overlock stitch.
Step 10: Finish the garment
The tenth and final step of apparel manufacturing is to finish your garment for mass production using various techniques and equipment.
Finishing is the last but not the least important aspect of garment making, as it adds value and quality to your garment. Finishing is the process of enhancing the appearance and performance of your garment after sewing.
Finishing techniques are the methods that you use to apply different treatments or effects to your garment. Finishing equipment are the machines or tools that you use to perform different finishing techniques.
Here are the various types of finishing techniques:
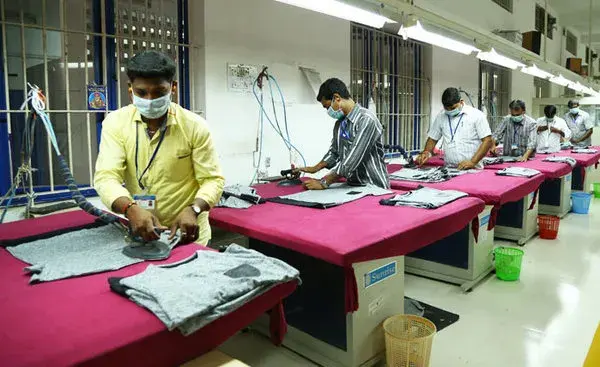
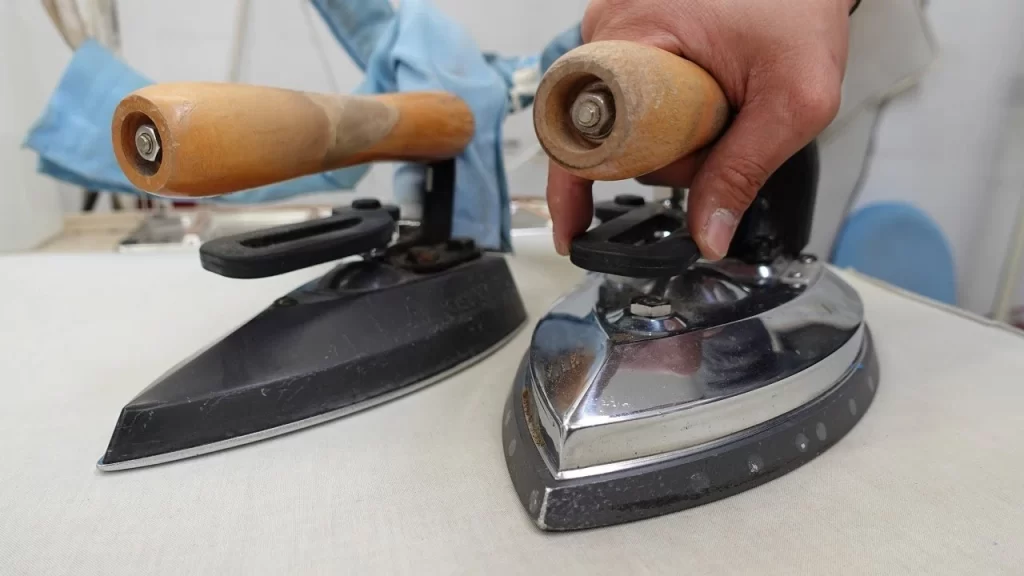
1) Pressing is the technique of applying pressure and heat to your garment to smooth out wrinkles and creases. This technique gives your garment a crisp and neat look, as well as improves its shape and drape. Pressing can be done by hand or with the help of equipment such as presses, irons, or steamers.
2) Ironing is the technique of moving a heated iron over your garment to smooth out wrinkles and creases. This technique is similar to pressing, but requires more skill and care, as it can damage or scorch your fabric if not done properly. Ironing can be done by hand or with the help of equipment such as irons or steamers.
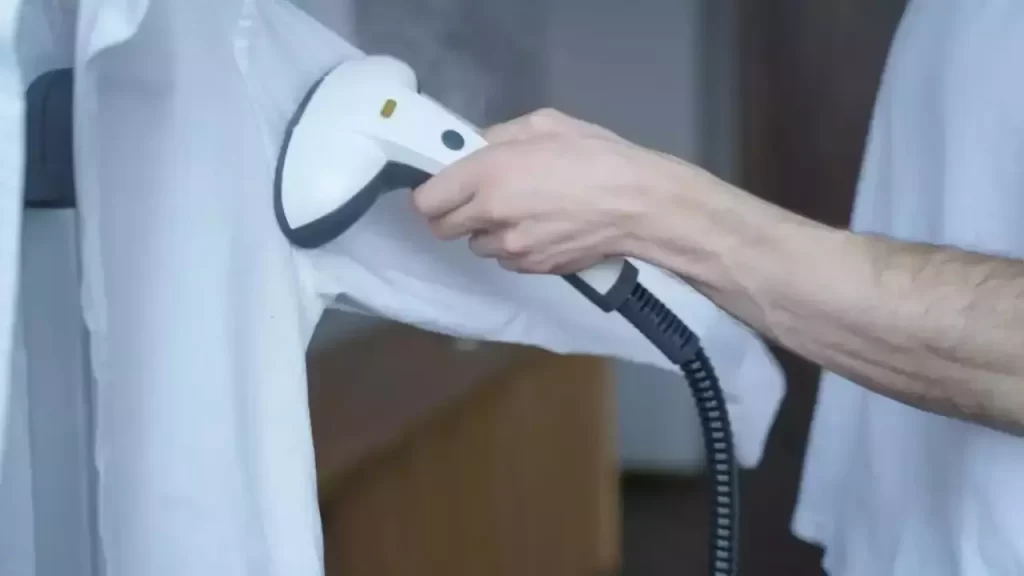
3) Steaming is the technique of applying steam to your garment to relax the fibers and remove wrinkles and creases. This technique is gentler and faster than pressing or ironing, as it does not require direct contact with your fabric. Steaming can be done by hand or with the help of equipment such as steamers or steam tunnels.
4) Trimming is the technique of cutting off any excess threads or fabric from your garment. This technique improves the appearance and quality of your garment, as well as prevents any unraveling or fraying of your fabric. Trimming can be done by hand or with the help of equipment such as scissors, knives, or trimmers.
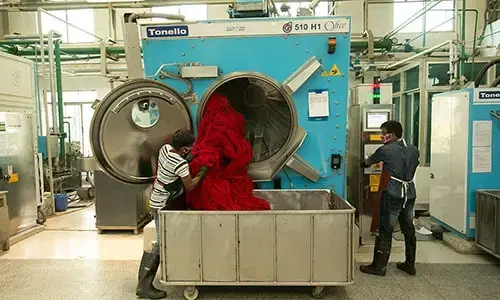
5) Cleaning is the technique of removing any dirt or stains from your garment by washing or dry cleaning. This technique ensures that your garment is hygienic and ready for wear or sale. Cleaning can be done by hand or with the help of equipment such as washers, dryers, or cleaners.
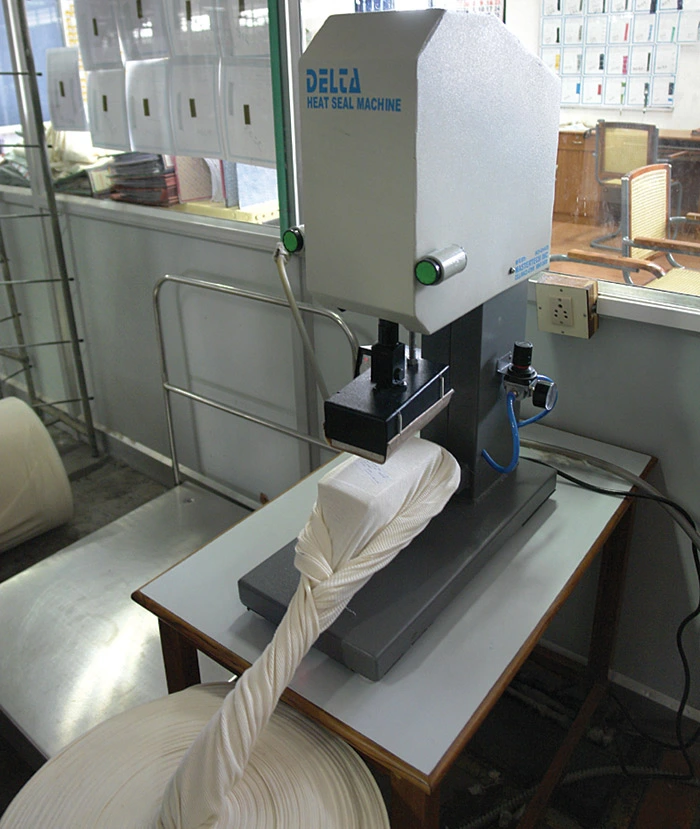
6) Labeling is the technique of attaching labels to your garment that show information such as brand name, size, care instructions, etc. This technique provides identity and information to your garment, as well as enhances its value and appeal. Labeling can be done by hand or with the help of equipment such as printers, sewers, or heat sealers.

7) Tagging is the technique of attaching tags to your garment that show information such as price, barcode, style number, etc. This technique provides identification and information to your garment, as well as facilitates its tracking and inventory management. Tagging can be done by hand or with the help of equipment such as printers, taggers, or staplers.
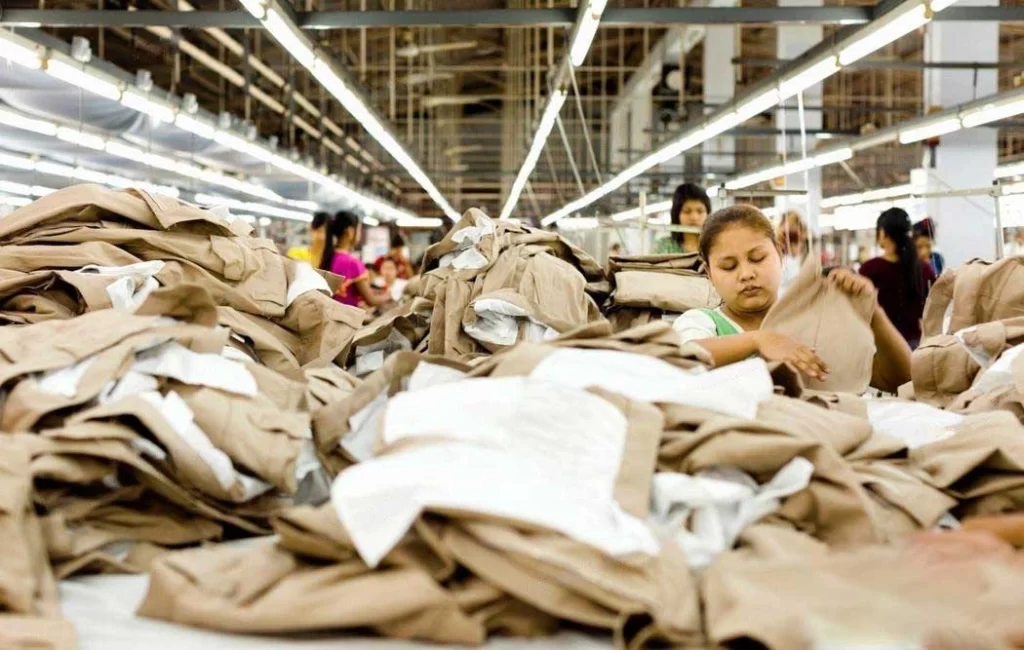
8) Folding is the technique of folding your garment into a neat shape for storage or display. This technique saves space and protects your garment from wrinkles and damages. Folding can be done by hand or with the help of equipment such as folders, hangers, or clips.
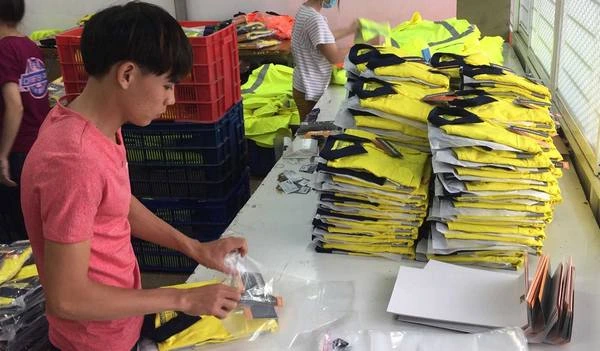
9) Packing is the technique of packing your garment into bags or boxes for shipping or distribution.
This technique secures and preserves your garment during transportation and delivery. Packing can be done by hand or with the help of equipment such as bags, boxes, tapes, or sealers. Makers use equipment such as presses, irons, steamers, scissors, washers, dryers, printers, etc. to finish your garments.
Apparel Manufacturing in India
- The apparel manufacturing industry in India is one of the largest and fastest-growing markets in the world. It contributes about 2.3% to the country’s GDP, 7% to the industry output in value terms, and 11.4% to the total exports.
- Apparel manufacturing in India is also one of the largest employers, providing direct employment to 45 million people and indirect employment to 100 million people. It is also a major source of income and empowerment for women and rural communities.
- The industry has a strong presence in both domestic and international markets. It produces a wide range of products, such as cotton, silk, woolen, synthetic, and technical textiles. It also exports to various destinations, such as the US, EU, UAE, UK, etc.
- The apparel manufacturing industry in India has also shown remarkable resilience and innovation during the Covid-19 pandemic. It has become the second-largest manufacturer of PPE in the world, with more than 600 certified companies. It has also adopted digital solutions and sustainable practices to cope with the changing market conditions.
Queries and questions on the Apparel Manufacturing business?
Learning how clothes are made can help you appreciate the craftsmanship and creativity behind every garment you wear or design.
It can also help you make informed choices about the quality, cost, sustainability, and compliance of the clothes you buy or sell.
If you want to learn more about apparel manufacturing or any other aspect of fashion manufacturing, please feel free to contact us or visit our website for more information.
We are Technopak, a leading management consulting firm that specializes in textiles and apparel manufacturing, packaged foods and retail, among other domains.
We offer a range of services such as market research, strategy formulation, business planning, project management, etc.
We have extensive experience and expertise in the Indian apparel industry and can help you achieve your goals and grow your business.
Please share your feedback and comments below. We would love to hear from you!